Have you always relished the opportunity to install herringbone tiles on the floor of your house or office? Here is another chance to learn about the particular herringbone tiles pattern to bring your floor alive again. One of the initial concerns of this tiling pattern is the cost of hiring someone to do it or execute it on a DIY basis. Installing the herringbone tiles can be labour-intensive if you choose the do-it-yourself approach. But in the end, every effort is worth it.
On the other hand, if you need help with either the preparation, actual laying or the installation of herringbone tiles, the Tile and Bath Co is here for you. You can depend on Tile and Bath Co for an excellent experience of using the herringbone tiles anywhere in your home. Whether you have a preinstalled tile or are planning to lay them anew, herringbone tiles look perfect on the home floor without a doubt.
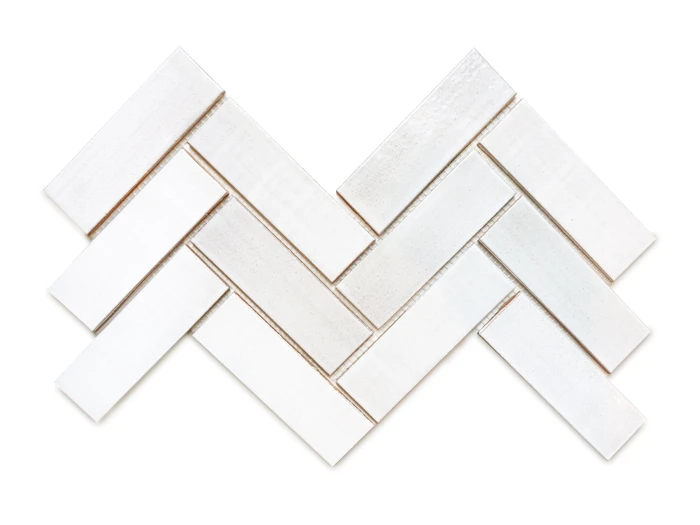
One significant advantage of installing herringbone floor tiles is the ability to customize the designs anyhow you want them. At the same time, you may choose herringbone tiles for your kitchen, bathroom, toilet, or practically anywhere in the home, and it still looks perfect. Click here to read about The History of the Herringbone Pattern and How to Use it today.
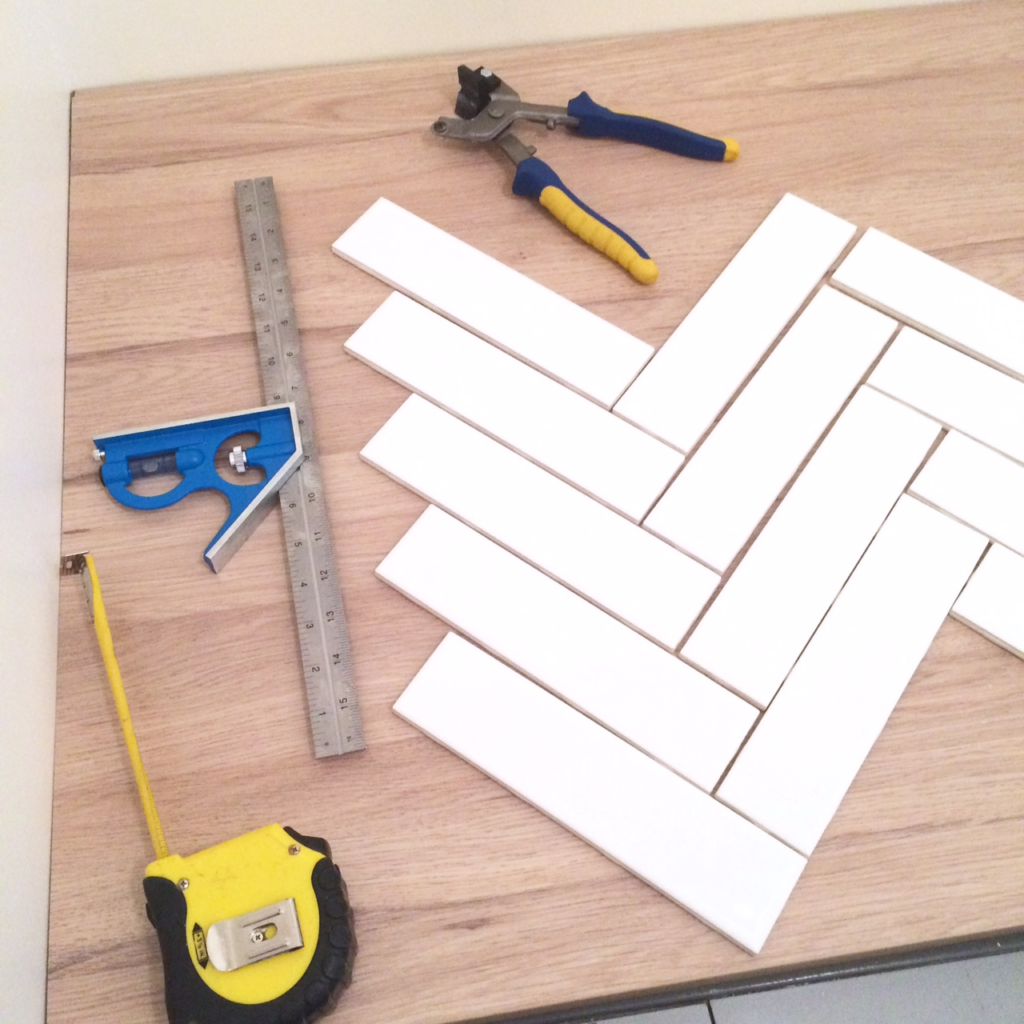
Supplies for installing Herringbone Floor Tiles
For a start, what are the primary supplies that you need to put in place in preparation for the installation of herringbone tiles?
- The Tiles. We will soon discuss how to know the number of tiles that you need. but one of the most common choices is the Bucak Lt Walnut H/F 5 x 20cm
- An admixture of flexible grout
- Epoxy film grout remover
- The grout continuing desert sand
- Proflex thinset mortar
- Mortar mixing paddle in connection to a power drill
- Ryobi AirStrike Nail Gun
- Hand trowel
- Notched trowel
- Multi-Tool
- Large and sealer sponges
- Bristle brush
- 1/16 inches spacers
- Tile saw
- Travertine sealer
- Grout float tool
- Eye and ear protection
- At least, 3 different buckets, each to contain water, grout and water
- Caulk
- Paint and foam brush for touch-ups
- Reinstallation items for the toilet and sink, if removed
- Concrete backer board in case you plan to lay a wood subfloor
Step-By-Step Instruction to Install the Herringbone Floor Tiles
- How to Determine the Number of Herringbone Tiles You Need
In determining the total surface area of the floor or wall to place the tiles, you need to differentiate between a rectangular surface and other polygonal shapes. For instance, the floor may have regular four sides, which is easier to measure. On the other hand, it may have more than four sides, which can be trickier to measure. So, we will give an insight on how to work with both types. In the Regular Square or rectangle case, simply measure the length and width of the room, and the product will give you the total surface area.
On the other hand, if your room is polygonal, you need to draw up imaginary lines to divide the room into rectangles. After then, calculate each rectangle area and add it up to give you the total surface area. Either way, however, you must add 10% of the total surface area to provide for the tiles that may break, cuts or fall into the error category.
Then, divide the total by the area dimensions of each herringbone tile. That way, you have the number of tiles you need. Since herringbone tiles are in boxes of actual numbers, you can determine the number of packages you need. Whereas, round up the last to full box size and place the order for your herringbone tile boxes that you need.
- Tiling demo and preparation to install the herringbone Floor Tiles
Before installing the herringbone tiles, the first preparation is to remove any disturbing feature you may have in the room. In our case, we had to remove the pedestal sink and even our toilet system from the bathroom before installing white herringbone tiles. The next step is to demo the existing flooring system, whether made of wood or concrete. In our case, we only had linoleum, so it was way easy to remove it by pulling it right up.
If you have a concrete floor underlay, you need to ensure that it is perfect before proceeding. On the other hand, if not, you may have to first do some repairs on the underlay surface. Now, use a multi-tool to trim your door frames according to the requirements of the tile installation. By placing thin cardboard on the ground and a piece of tile on it, you can determine the approximate height of the herringbone tiles plus the thin-set after installation. In addition, this estimate will give you an idea of how much you need to trim the door frames.
- How to cut Herringbone Tiles during Installation
The tool for cutting is the tile saws that can work as a table saw with a blade under a table, and you just need to move the tile over it. On the other hand, some tile saws require that you move saw blades over them. The first type is usually cheaper than the second one. In contrast, the second is more suitable for making some intricate cuts. Just choose the correct tile saw and carefully move it over your tiles to bring out the desired shapes. Also, don’t forget to use ear and eye protection when sawing the tiles. You may also want to measure twice before the actual cutting begins.
- How to Install a Thinset under Herringbone Floor Tiles
The first step is to gently mix your mortar (thin-set) mixture with some water from the water bucket until you have a paste-like uniformity. Use the mortar mixing paddle that is connected to the drill to do the mixing. When the floor is ready, begin to place portions of your mixture on the floor in the desired thickness. This thickness must be uniform because it will determine the height level of your installed herringbone tiles.
- How to Install the Herringbone Floor Tiles
There are two common ways to lay the herringbone tiles on the floor. The first one is to first spread the thin-set on the concrete with a hand trowel while placing the tiles directly on it. This way, you have to hold the notched trowel at an angle of 450 to the floor so that it creates grooves in the thin-set. The essence of the grooves is to make enough room for the tile without the thin-set spreading out too far.
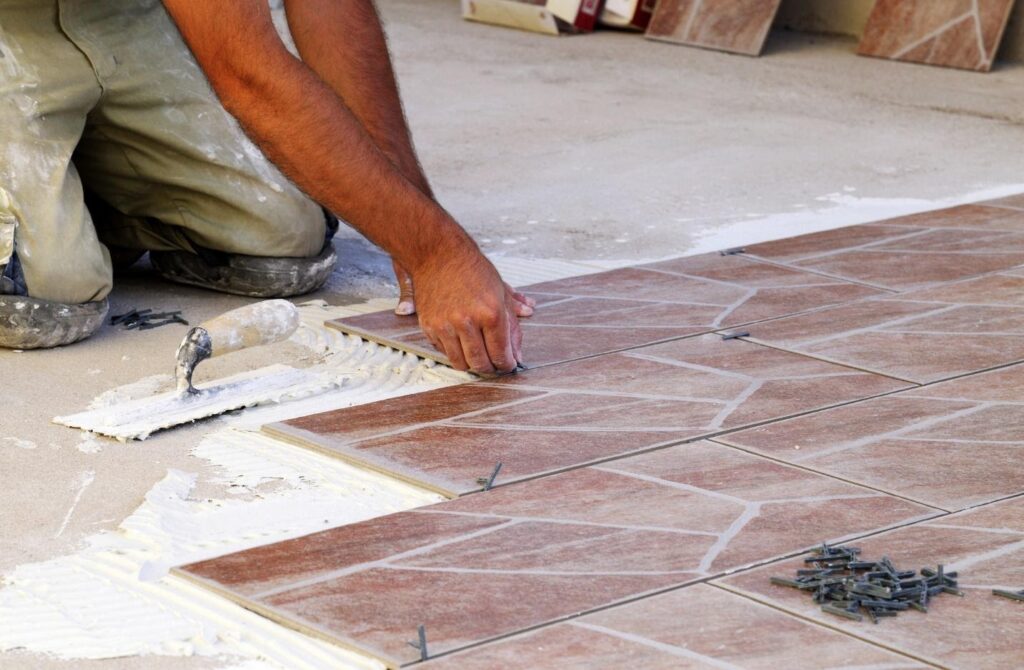
The second method of installing herringbone tiles involves back-buttering the tiles with the thin-set before placing them down. Whereas you will also need the notched trowel at angle 450 to make similar grooves in the thin-set before final placement. The tile placing is done in portions, and you need to stand on the undone pieces while laying them to avoid resting your weight on some parts. In other words, start from the farthest portions of the room up to the entrance.